Sentinel 流量控制
快速上手
1、创建应用
创建一个命名为: sentinel-cloud-view-example 的 Spring cloud 应用,
2、添加依赖
    <parent>
        <groupId>org.springframework.boot</groupId>
        <artifactId>spring-boot-starter-parent</artifactId>
        <version>2.1.13.RELEASE</version>
        <relativePath/> <!-- lookup parent from repository -->
    </parent>
    <groupId>com.mtcarpenter</groupId>
    <artifactId>sentinel-cloud-view-example</artifactId>
    <version>0.0.1-SNAPSHOT</version>
    <name>sentinel-cloud</name>
    <description>Demo project for Spring Boot</description>

    <properties>
        <java.version>1.8</java.version>
        <alibaba.version>2.1.2.RELEASE</alibaba.version>
        <spring.cloud.version>Greenwich.RELEASE</spring.cloud.version>
    </properties>

    <dependencies>
        <dependency>
            <groupId>org.springframework.boot</groupId>
            <artifactId>spring-boot-starter-web</artifactId>
        </dependency>

        <dependency>
            <groupId>org.springframework.boot</groupId>
            <artifactId>spring-boot-starter-actuator</artifactId>
        </dependency>
        <dependency>
            <groupId>com.alibaba.cloud</groupId>
            <artifactId>spring-cloud-starter-alibaba-sentinel</artifactId>
        </dependency>

        <dependency>
            <groupId>org.projectlombok</groupId>
            <artifactId>lombok</artifactId>
        </dependency>

        <dependency>
            <groupId>org.springframework.boot</groupId>
            <artifactId>spring-boot-starter-test</artifactId>
            <scope>test</scope>
        </dependency>
    </dependencies>

    <dependencyManagement>

        <dependencies>
            <dependency>
                <groupId>org.springframework.cloud</groupId>
                <artifactId>spring-cloud-dependencies</artifactId>
                <version>${spring.cloud.version}</version>
                <type>pom</type>
                <scope>import</scope>
            </dependency>
            <dependency>
                <groupId>com.alibaba.cloud</groupId>
                <artifactId>spring-cloud-alibaba-dependencies</artifactId>
                <version>${alibaba.version}</version>
                <type>pom</type>
                <scope>import</scope>
            </dependency>

        </dependencies>
    </dependencyManagement>
3、增加配置
在 application.properties 中配置 sentinel dashboard 的地址:
# 服务名称
spring.application.name=sentinel-view-example
# 服务端口
server.port=8081
# sentinel dashboard
spring.cloud.sentinel.transport.dashboard=localhost:8080
port:项目端口spring.application.name:服务名称spring.cloud.sentinel.transport.dashboard: sentinel dashboard 界面地址
4、加注解
在启动类上加入注解,这里暂无注解。
5、控制类
@RestController
@RequestMapping("/flow")
public class FlowController {

    @GetMapping("/test")
    public String test(){
        return "mtcarpenter:test";
    }

}
6 、启动程序
多访问几次接口 http://localhost:8081/test/echo。
7、sentinel 界面查看状态
因为 sentinel 默认是懒加载的,所以通过接口访问出发控制面板的显示。
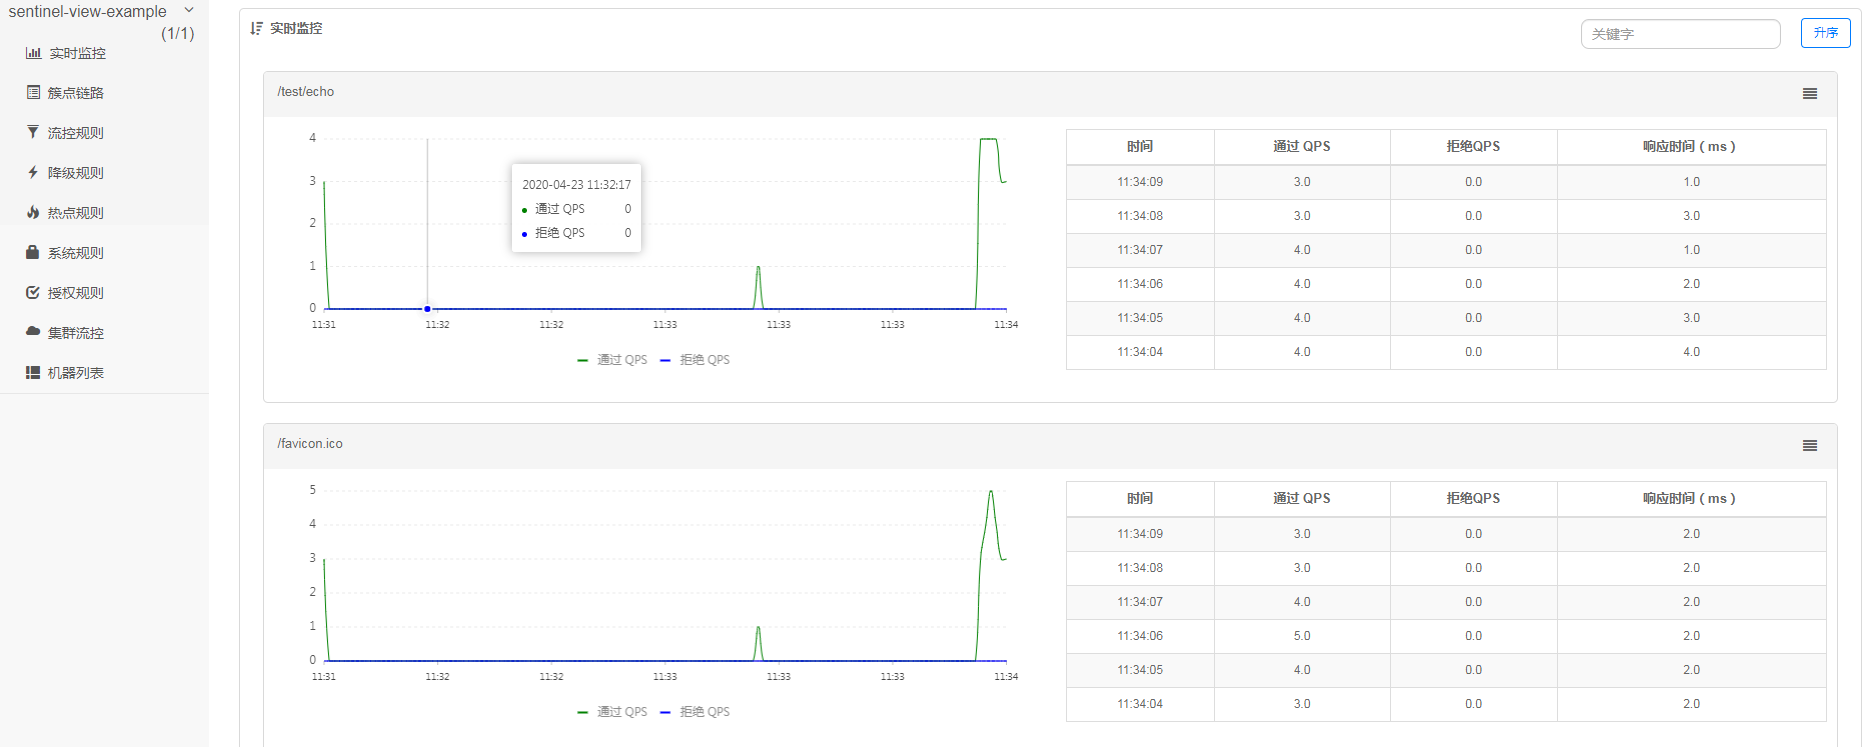
- 每一个请求的接口被都会展示,很方便看到如,请求的时间、通过的 QPS 、拒绝的 QPS、响应时间(ms)。
流控规则配置
新手上路
- 进入
簇点链路,找到上面我们请求的flow/test出现在界面中,现在配置该接口的流控

- 配置
单机阀值

一条限流规则主要由下面几个因素组成,我们可以组合这些元素来实现不同的限流效果:
resource:资源名,即限流规则的作用对象count: 限流阈值grade: 限流阈值类型(QPS 或并发线程数)limitApp: 流控针对的调用来源,若为default则不区分调用来源strategy: 调用关系限流策略controlBehavior: 流量控制效果(直接拒绝、Warm Up、匀速排队)
配置之后成功会自动跳转到
流控规则,也可以通过流控规则直接配置。
- 流控规则

-
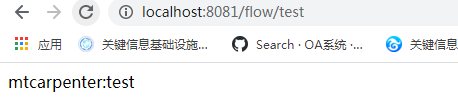
验证流控规则配置是否成功
- 未被限流正常返回
- 限流返回如下
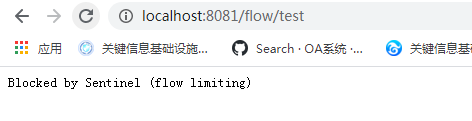
在这里实现了使用sentinel接口限流。
初试牛刀
关联资源
在 FlowController新增如下接口用于关联资源测试
@GetMapping("/test-a")
public String testa(){
    return "mtcarpenter:test-a";
}
在FlowController新增test-a接口用于测试流控规则中关联资源。

这里表达的意思是关联资源超过1,资源名将被限流。
接口flow/test-a超过 1 , flow/test 将被限流。
postman Runner请求flow/test-a

- 在
flow/test-a一直被请求的时候,flow/test请求会被限流

链路
- 新建
FlowService,作为公共访问方法。
@Service
public class FlowService {

    @SentinelResource("common")
    public String common(){
        return "common";
    }
}
@SentinelResource("common") 定义资源为common
- 在
FlowController新增如下接口用于关联资源测试
    @Autowired
    private FlowService flowService;

	@GetMapping("/test-b")
    public String testb(){
        flowService.common();
        return "mtcarpenter:test-b";
    }

    @GetMapping("/test-c")
    public String testc(){
        flowService.common();
        return "mtcarpenter:test-c";
    }
sentinel1.7.0 链路需要配置开启链路限流如下,(如不需要链路限流,application,配置类,依赖可以不加入):
application.properties
spring.cloud.sentinel.filter.enabled=false
配置类
@Configuration
public class FilterContextConfig {
    /**
     * @NOTE 在spring-cloud-alibaba v2.1.1.RELEASE及前,sentinel1.7.0及后,关闭URL PATH聚合需要通过该方式,spring-cloud-alibaba v2.1.1.RELEASE后,可以通过配置关闭:spring.cloud.sentinel.web-context-unify=false
     * 手动注入Sentinel的过滤器,关闭Sentinel注入CommonFilter实例,修改配置文件中的 spring.cloud.sentinel.filter.enabled=false
     * 入口资源聚合问题:https://github.com/alibaba/Sentinel/issues/1024 或 https://github.com/alibaba/Sentinel/issues/1213
     * 入口资源聚合问题解决:https://github.com/alibaba/Sentinel/pull/1111
     */
    @Bean
    public FilterRegistrationBean sentinelFilterRegistration() {
        FilterRegistrationBean registration = new FilterRegistrationBean();
        registration.setFilter(new CommonFilter());
        registration.addUrlPatterns("/*");
        // 入口资源关闭聚合
        registration.addInitParameter(CommonFilter.WEB_CONTEXT_UNIFY, "false");
        registration.setName("sentinelFilter");
        registration.setOrder(1);
        return registration;
    }
}
new CommonFilter()引入所需包无法找到,引入以下依赖
加入依赖
<dependency>
    <groupId>com.alibaba.csp</groupId>
    <artifactId>sentinel-web-servlet</artifactId>
    <version>1.7.0</version>
</dependency>
链路这里踩坑,之前在使用
Sentinel 1.6.2默认是开启得,不断迭代的版本有所变化,可以通过Issues进行查看。
test-b和test-c都调用common方法,重新启动程序分别请求这两个接口,在sentinel dashboard出现得资源common。

- 配置资源名
common得流控规则如下

使用 common中得入口资源/flow/test-c,单机阈值为1限流,其他使用common资源正常使用。
/flow/test-c被限流如下:

流控效果
当 QPS 超过某个阈值的时候,则采取措施进行流量控制。流量控制的效果包括以下几种:直接拒绝、Warm Up、匀速排队。
直接拒绝
达到阈值直接抛出异常,默认Wie快速失败。
Warm Up 冷启动,预热
官方文章参看:限流—冷启动
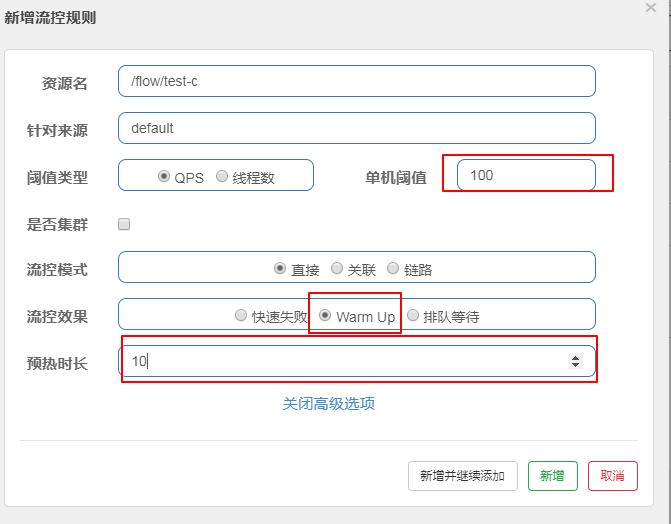
常用在秒杀时,用图举例,现在单机阀值为100, 设置预热之后,现在的阀值实际为 100/3(可参看上面的冷启动链接) ,即阀值为33,然后过了10秒,阀值才会达到 100。
排队等待
官方文章参看:流量控制-匀速排队模式

如上图举例,单机阈值超过10,将进入排队等待,最长等待超时时间为10000毫秒。
Sentinel 踩的坑
spring.application.name多了一个空格引起的一场翻车事故。

- 有无空格启动各启动一次,进入
sentinel控制台如下:

- 空格出现导致的问题
降级无法使用。
总结
**由于版本不断变化,当前在 cloud alibaba 2.1.2.RELEASE 环境测试 **
sentinel 的配置比较丰富,更多相关流量控制可以参看如下:
文章参考
- https://github.com/alibaba/Sentinel
代码示例
本文示例代码访问下面查看仓库:
- Github: https://github.com/mtcarpenter/spring-cloud-learning
- gitee : https://gitee.com/mtcarpenter/spring-cloud-learning
其中,本文示例代码名称:
sentinel-cloud-view-example:流量控制
![]()
微信扫描二维码,关注一个有故事的程序员
(转载本站文章请注明作者和出处 山间木匠-mtcarpenter)